From Dirt to Dream Yard: Backyard Lawn Renovation with complete Sod Installation
At PHR Landscapes, LLC, we specialize in lawn makeovers that solve long-standing problems. In this recent project, a frustrated homeowner came to us after multiple failed attempts with various other landscaping services over years’ past. Their backyard was a dirt-patch mess—and they were ready for a real solution.
Read more on how we delivered just that: a vibrant, low-maintenance lawn that’s as beautiful as it is functional. Let’s break it down, step by step.
Project Planning: A Smarter Strategy from the Ground Up
If you’ve read any of our past project summaries, you’ll know we always say, “Every successful landscape renovation starts with a solid plan”. We started this job by meeting with the client on-site to assess the existing conditions and understand their goals. We paid close attention to:

- Sun and shade patterns, which directly affect turf health.
- Soil composition, compaction, and drainage.
- Past treatment attempts, which revealed common pitfalls (like overseeding without addressing soil or shade problems).
Takeaway: Jumping straight into turf replacement without addressing root causes (light, soil, drainage) almost always leads to failure. A smart lawn renovation starts with problem-solving.
Step 1: Tree Elevation – Clearing the Way for Sunlight
Dense tree canopies were one of the biggest issues. Without enough direct sunlight, even the best sod won’t survive. We selectively elevated tree limbs and thinned out dense branches to allow more sunlight into the backyard.
Why Proper Sunlight Matters:
- Elevating trees can also make your backyard feel more spacious and open.
- Most turf grasses need 4–6 hours of sunlight daily to thrive.
- Better airflow reduces mold, mildew, and turf fungus issues.
Pro Tip: Tree work should always be handled by professionals. Incorrect cuts can damage the tree or cause regrowth that creates worse shading later.
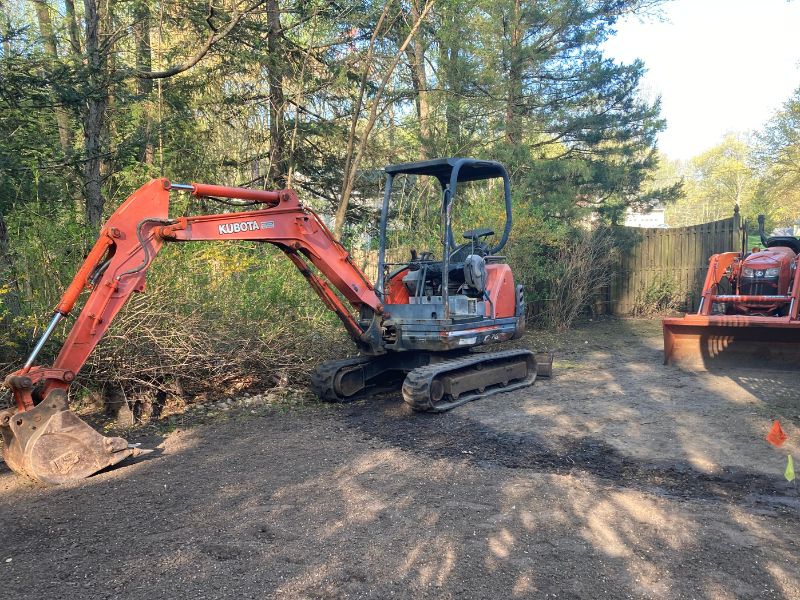
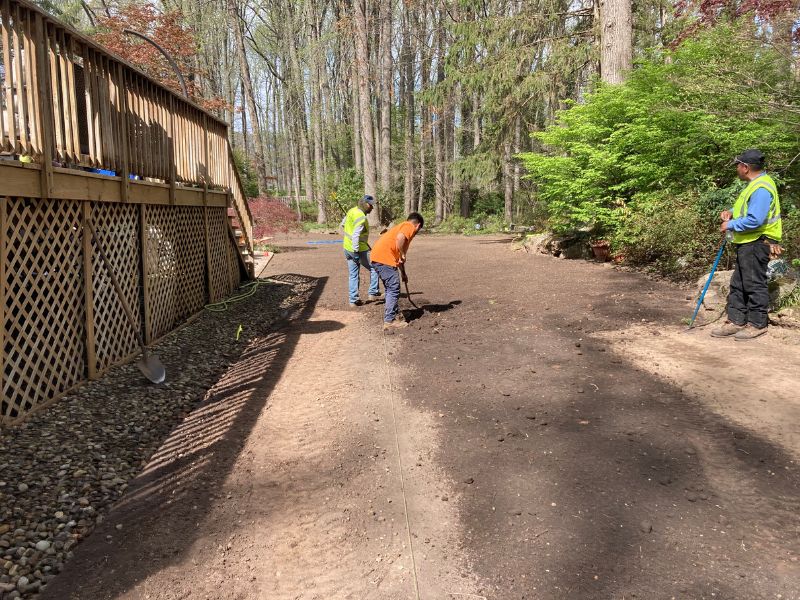
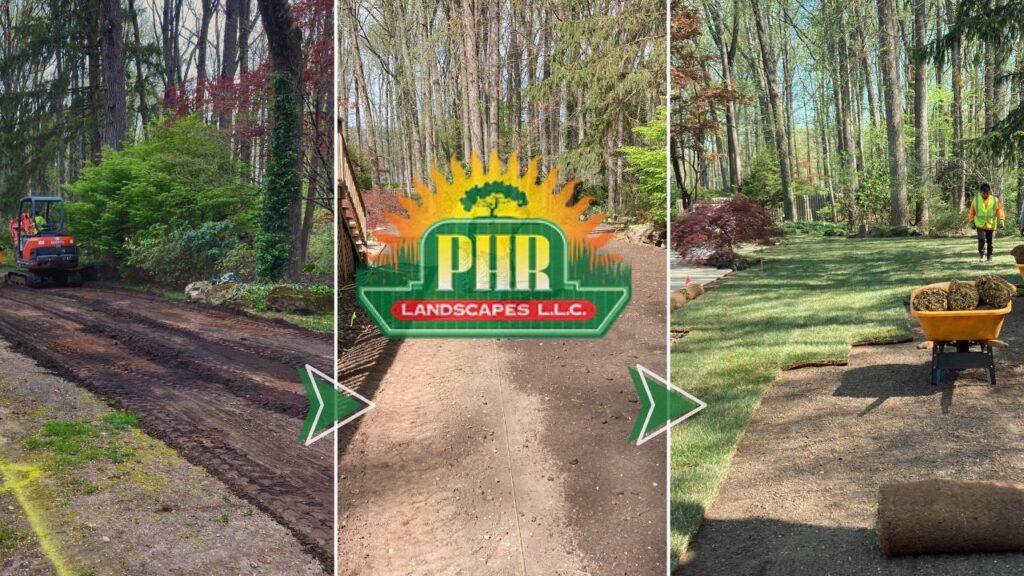
Step 2: Turf Removal – Clearing Out the Old to Welcome the New
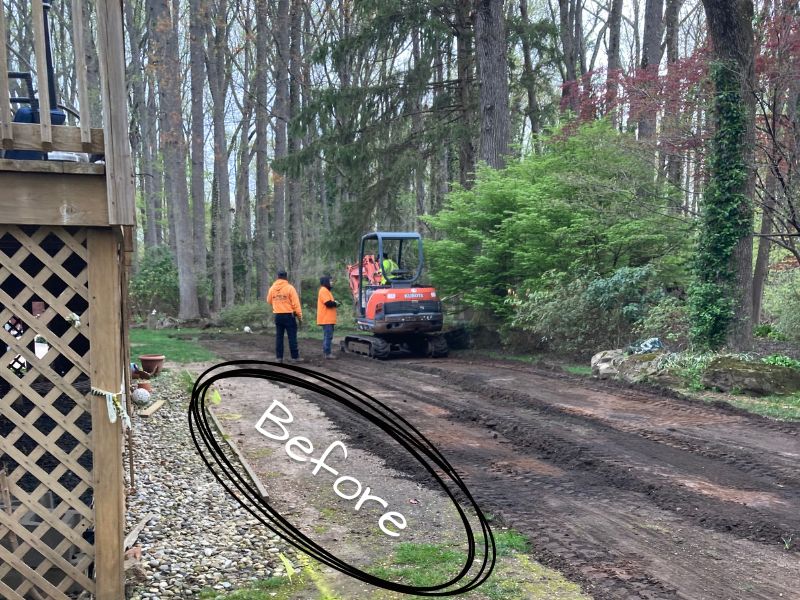
We used heavy equipment to bulldoze and remove the existing, struggling lawn. It had been patchy, uneven, and full of invasive grasses and weeds. Starting fresh gave us a clean canvas.
Benefits of Removing Old Turf:
- It eliminates disease and weed roots that could infect new sod.
- It prevents uneven grading caused by leftover turf clumps.
- It ensures a smooth, level surface for sod to take root evenly.
Pro Tip: This step isn’t just about looks—it’s essential for sod success. Sod needs to sit flush with the soil to root properly.
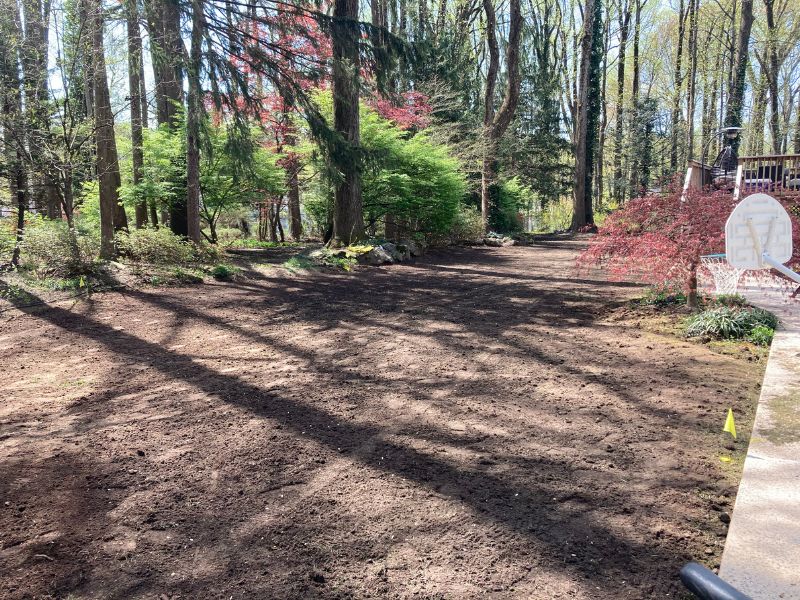
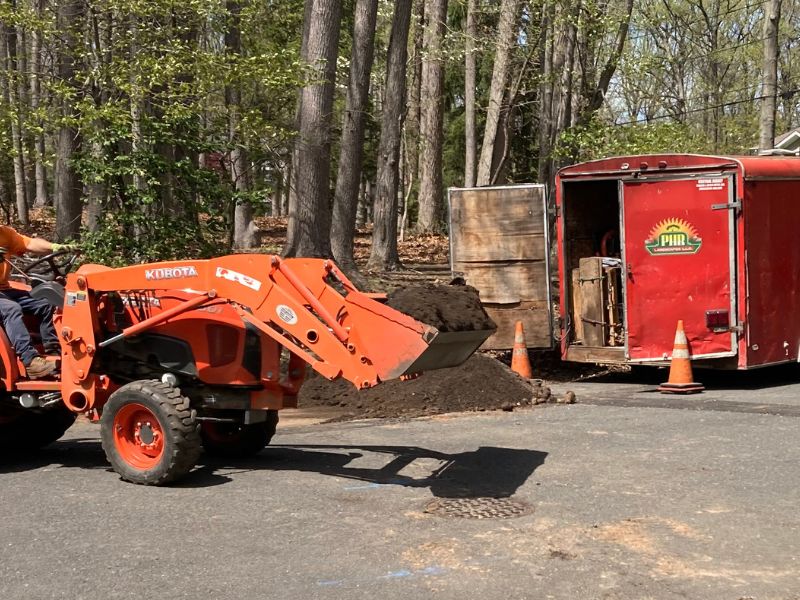
Step 3: Soil Improvement and Grading – The Foundation of Lawn Health
After clearing the yard, we trucked in fresh topsoil, mixing it into the existing base to enrich and improve the soil structure. We then performed rough grading followed by a precise finish grade with a subtle slope for water runoff. We also added and set stepping stones to the side of the deck for passage, for the sod to be laid over.
Why Proper Grading is Important:
- Poor drainage leads to soggy spots and root rot.
- A smooth, pitched grade keeps water moving away from your home.
- It also helps avoid uneven settling and tripping hazards.
Good to know: Blending new and existing soil reduces sharp layering that can trap water and limit root growth. We use cultivators to ensure deep, even integration.
Step 4: Sod Installation – Rolling Out the Grass Carpet
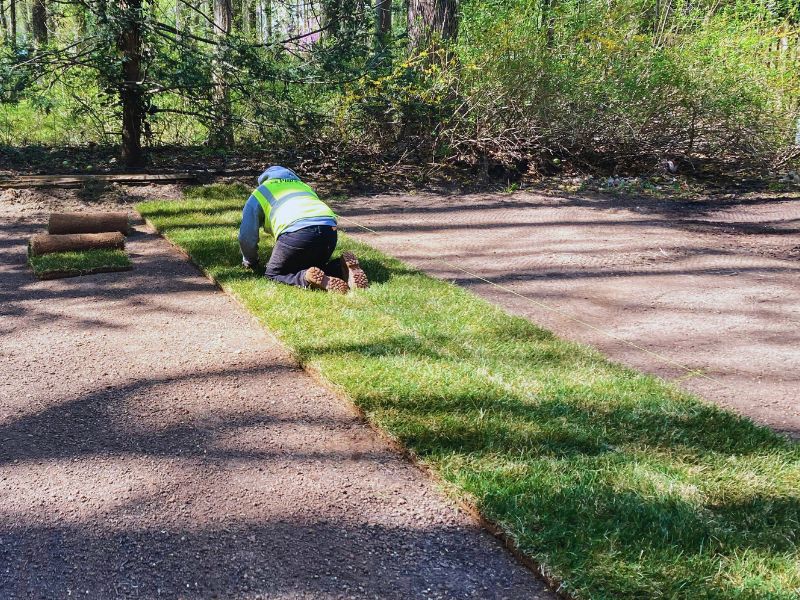
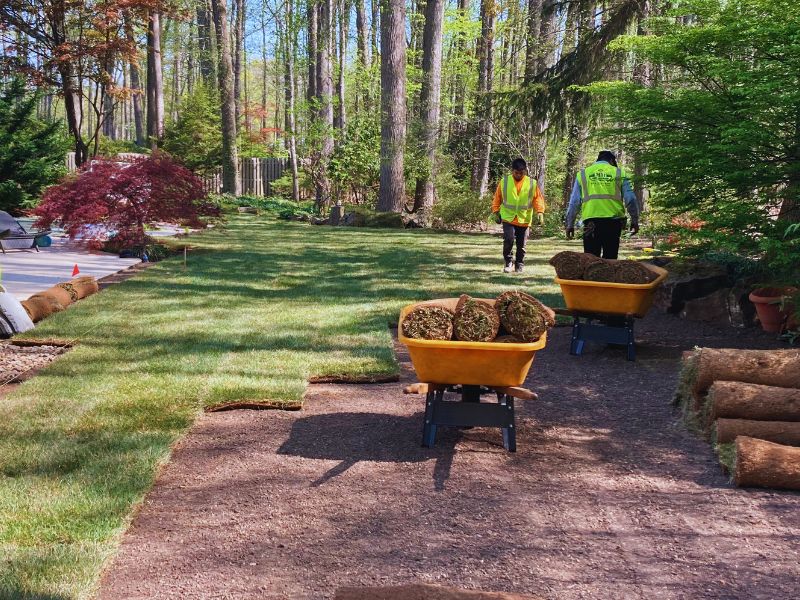
We started sod installation from a straight edge and staggered the seams like bricks to ensure stability and avoid long visible lines. Each piece was tightly butted together, and we trimmed around the edges to fit the shape of the yard perfectly.
Why Sod Installation Technique Matters:
- Gaps between sod pieces dry out and invite weeds.
- Staggered seams reduce runoff channels and root weakness.
- Proper trimming avoids patchy edges and gives a finished look.
Pro Tip: The first watering should happen immediately after installation. Sod is living—it can dry out and die within hours in warm weather.
Step 5: Adding Hardscape – Form Meets Function

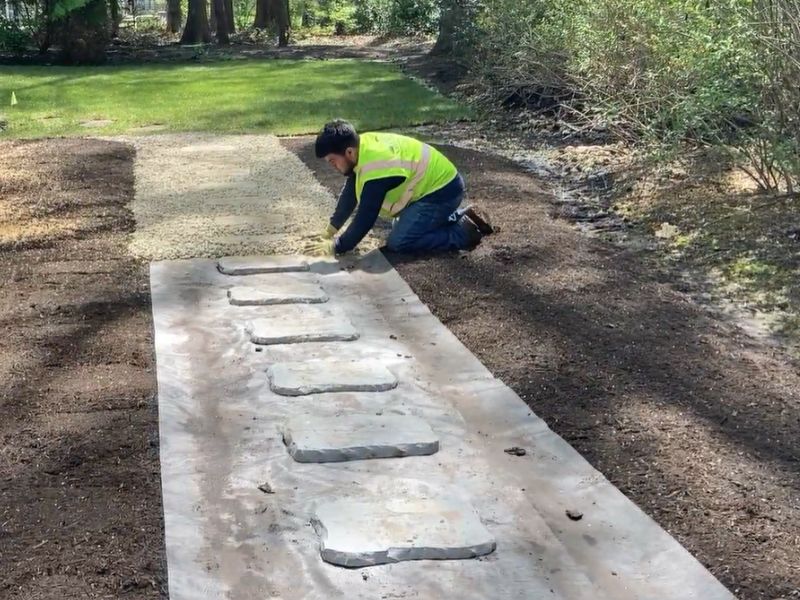
We added a transitional stepping stone walkway from the front yard, connecting to the stepping stones we added through the back. This not only enhanced the aesthetic appeal, but helps to manage foot traffic while a new lawn begins to grow.
Why Adding a Stepping Stone Walkway is a Smart Move:
- Stepping stones reduce wear on grass in high-use areas.
- They guide movement naturally, protecting newly laid sod.
- They tie together front and back yard design for a cohesive landscape.
Pro Tip: Choose stones that contrast slightly with your sod and mulch for better visual impact, and make sure they’re set flush to avoid trip hazards.
Step 6: Final Walkthrough and Lawn Care Instructions
We wrapped up by walking the property with the client, reviewing what had been done and giving clear instructions for lawn care during the critical first weeks. We covered:
Watering frequency (daily for the first 2 weeks, then tapering off).
Mowing guidelines (wait until it’s rooted, usually 2–3 weeks).
Traffic limits (no pets or play until it’s fully established).
Fertilizing timelines (wait about 4–6 weeks after installation).
Pro Tip: We recommend using a sprinkler timer or irrigation controller to avoid missed watering—a major cause of failed sod.
The Result: A Lawn Built to Last
The client now has a usable, stunning backyard that’s perfect for entertaining or relaxing—no more mud, no more dead patches. And we don’t just walk away. We perform follow-up visits throughout the season to monitor progress and ensure the lawn is establishing properly.
That’s the PHR difference—not just delivering great landscaping and hardscaping services, but standing by the results.
PHR Project Tips
5 Smart Strategies for a Full Landscape Overhaul
If you’re thinking about adding a stone walkway to connect your landscape, here are five tried-and-true tricks to make it worth your while:
1. Prep More Than You Think You Need To
Splitting a project into phases lets you manage budget, seasonality, and priorities. It also gives you time to adjust the plan as your lifestyle evolves.
2. Know Your Grass Type
Before laying pavers or planting grass, fix drainage issues. Water mismanagement can undermine even the best landscaping work.
3. Water Smart, Not Just Often
Go for deer-resistant, low-maintenance varieties that deliver year-round visual interest with minimal upkeep. It saves money and time long-term.
4. Protect High-Traffic Zones
Designing for capacity (e.g., 30+ people on the patio) ensures your outdoor spaces serve real-life needs—not just aesthetics.
5. Follow Up with Professional Maintenance
Deep bed edging, stone borders, and mulch transitions are small details that elevate the entire property. They also make mowing and maintenance easier.
Ready to transform your lawn into a lush, livable space? Sod or Seed, PHR has you covered.
Contact PHR Landscaping & Hardscaping for expert lawn renovation, sod installation, and landscape design services. We service Scotch Plains, Fanwood, Westfield NJ and surrounding areas with honest work and real results.
👉 Contact us today to start planning your transformation.
Share This Post with Friends & Colleagues
Follow us on Facebook @PHRLandscapes
Phone: (908) 322-6500
Email: [email protected]
1590 E. 2nd Street, Scotch Plains, NJ 07076